UTM (Urchin Tracking Module) parameters are tags that you can add to the end of a URL to track the effectiveness of your marketing campaigns. When someone clicks on a link with UTM parameters, they are sent back to Google Analytics, allowing you to see how many people clicked on the link and where they came from.
Several common UTM parameters are used to track marketing campaigns in Google Analytics:
utm_source: This parameter specifies the source of the traffic, such as “google,” “Facebook,” or “newsletter.”
utm_medium: This parameter specifies the medium through which the traffic was acquired, such as “CPC,” “banner,” or “email.”
utm_campaign: This parameter specifies the specific campaign that the traffic is associated with, such as “spring_sale” or “new_product_launch.”
utm_content: This parameter is used to differentiate between different versions of an ad or link, such as “banner_a” and “banner_b.”
utm_term: This parameter tracks the keywords used in paid search campaigns.
How to add UTM parameters using Replug?
There are two simple methods to add UTM parameters in Replug:
- Add UTMs while creating a CTA campaign
- Add UTMs while creating a Link
We’ll discuss each method individually.
Method 1:
Add UTM parameters while creating a CTA campaign:
Follow these simple steps to create a UTM through Replug CTA campaign:
Step 1: Create an account or sign in to Replug to access the main dashboard and select campaigns under the manage section.

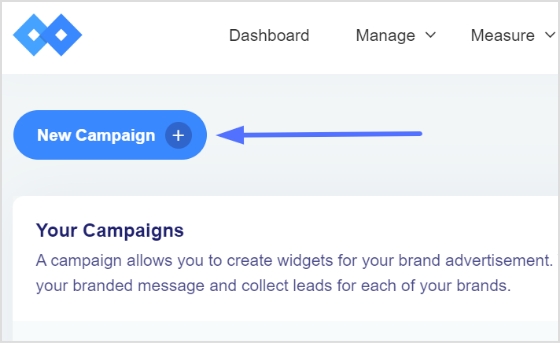
Step 2: In the campaigns section, click create a new campaign.
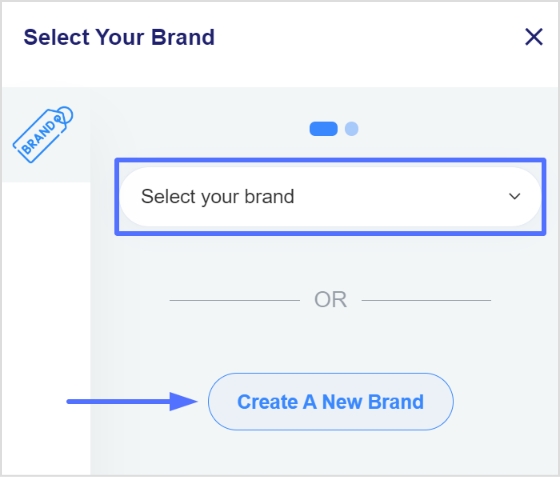
Step 3: To create a new campaign, you must select a brand first. You may choose an existing brand or create a new one if necessary.
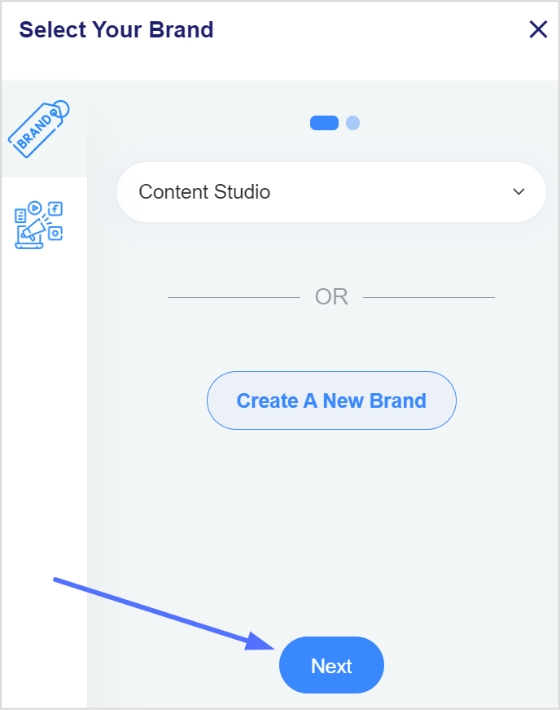
Step 4: Click the next button once you’ve selected or created a brand.
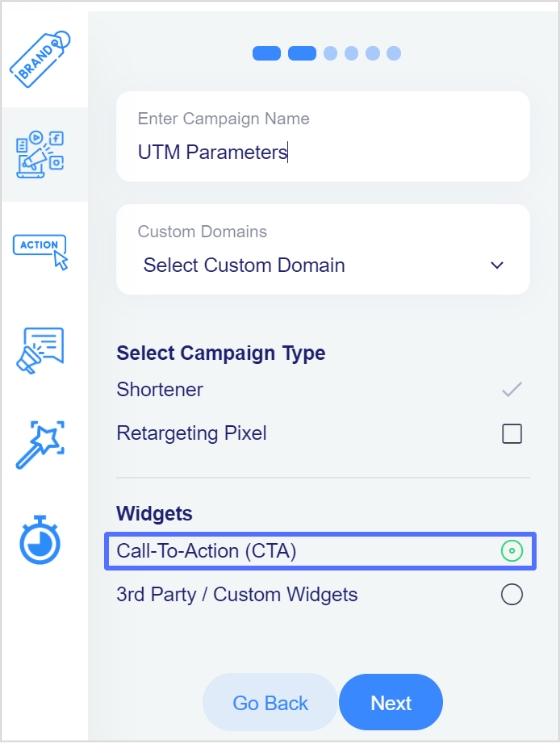
Step 5: You will now see a page for choosing a campaign type. Choose a name for your call-to-action campaign here.
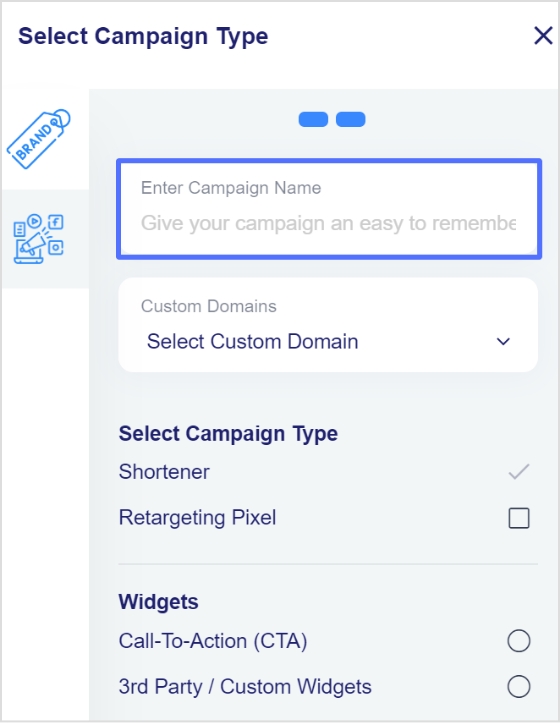
Step 6: Select the call to action option from the campaign type page and click the next button.
Increase your CTR with a Branded Link Now!

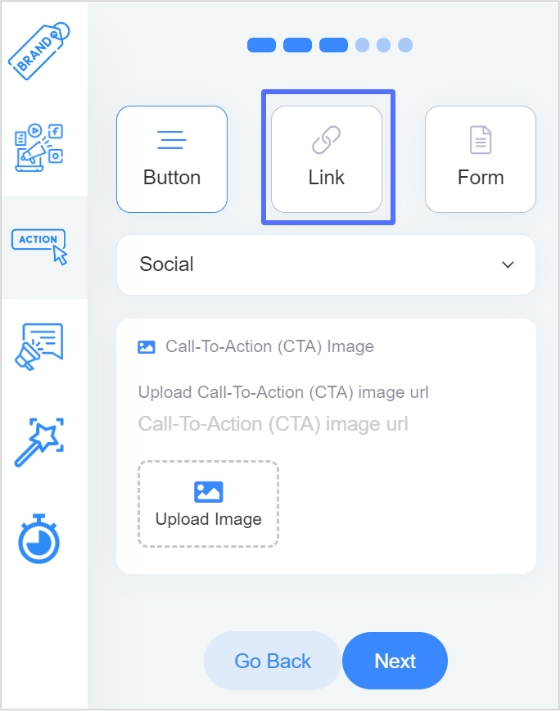
Step 8: Next, select your CTA type; here, we’ve selected a Link CTA.
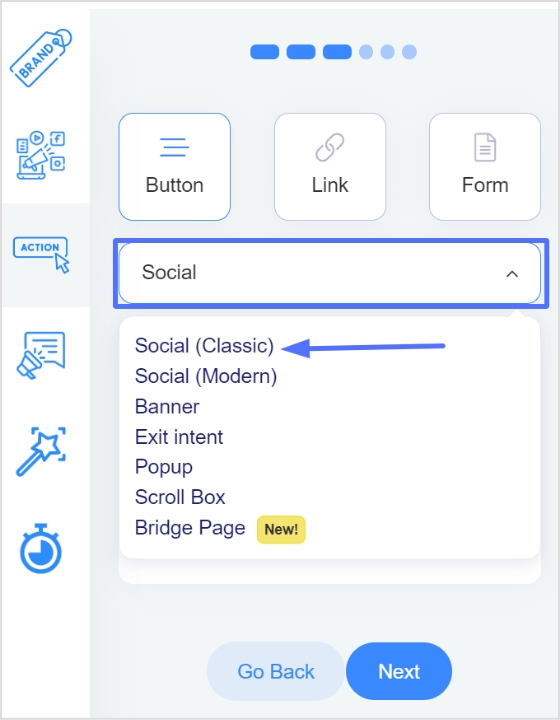
Step 7: After selecting the CTA type, you need to select the theme for your CTA.
Your CTA’s appearance depends on your CTA’s purpose. As for this case, we have chosen a Social (classic) CTA theme to appear after clicking the link.
Note: Read more about the use cases for different theme types to understand which CTA theme is perfect for you.
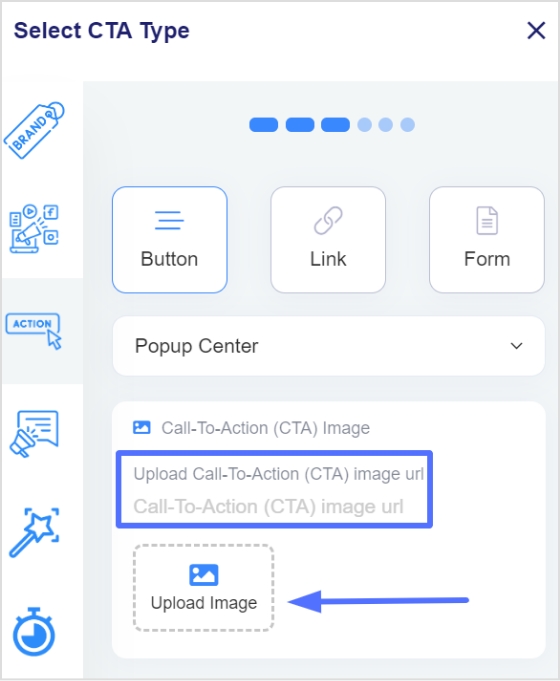
Step 8: Enter your URL, upload an image for the CTA, and click Next.
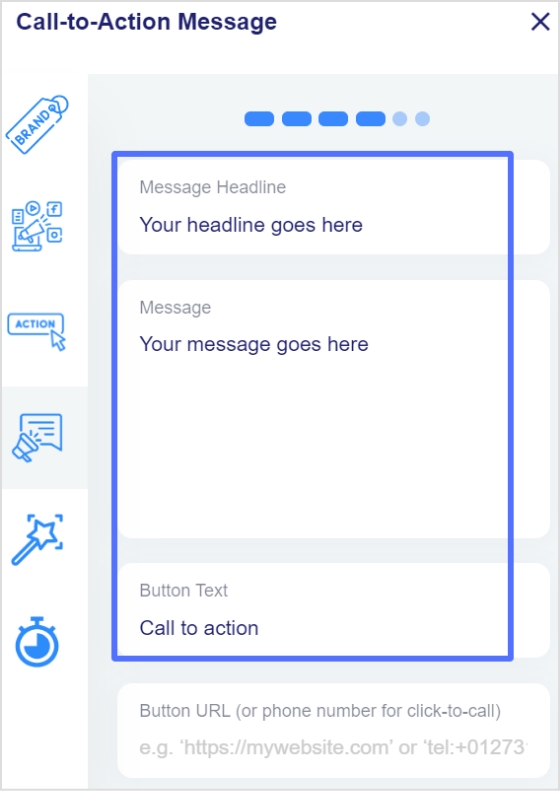
Step 9: You are now in the CTA message section.
Write your headline, message, and CTA button text.
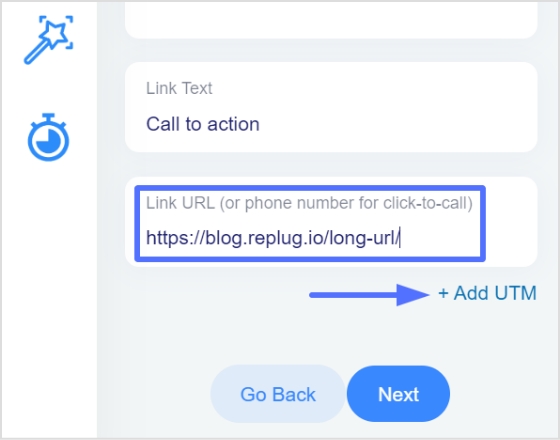
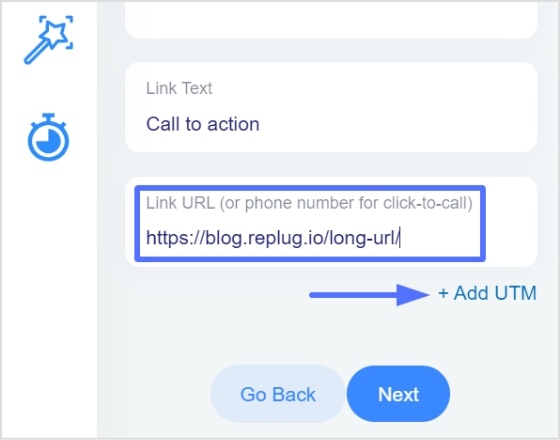
Step 10: Enter the URL of your CTA in the last block, and this is the stage where you add UTM parameters to your link. Click add UTM to add UTM parameters.
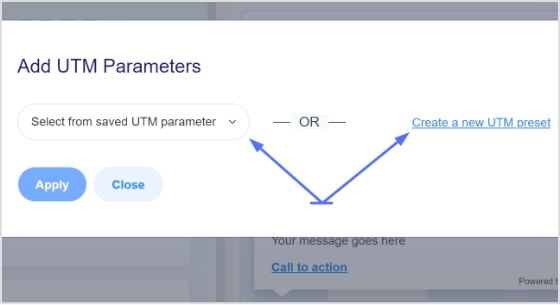
Step 11: Now, the UTM section will open, where you can select from saved UTM parameters or create a new UTM preset.
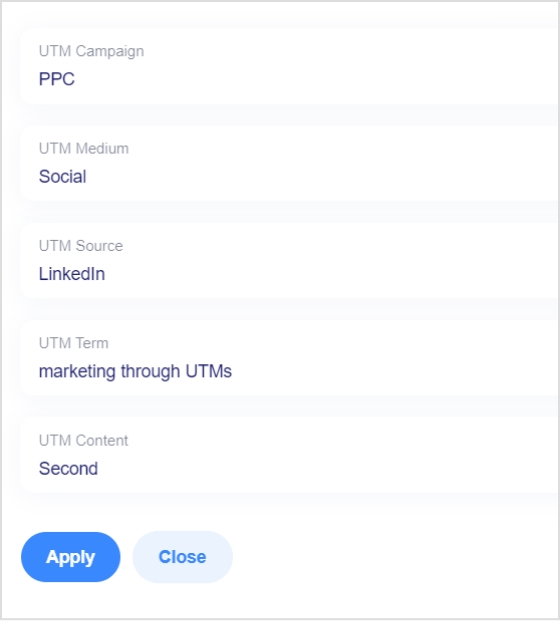
Step 12: Click create a new UTM preset and fill in the sections you intended to cover in your CTA campaign.
Once finished filling in, click apply and move to the next step.
Step 13: As you can see, your URL now contains UTM parameters, so click next and finish setting up your CTA campaign.
You can now share the link, examine who clicked on your link, and more!
Let’s move towards method 2 of creating UTM with Replug.
Method 2:
Add UTMs while creating a Link:
Here’s how to add UTM parameters with Replug links.
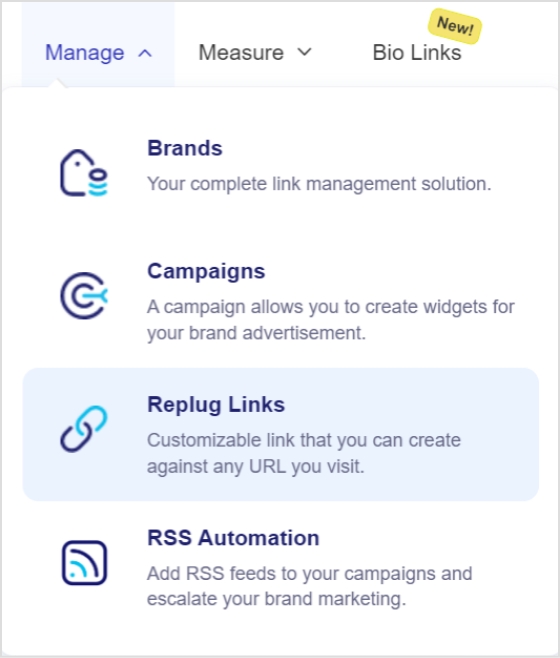
Step 1: Sign in to Replug to access the main dashboard and select Replug links under the manage section.
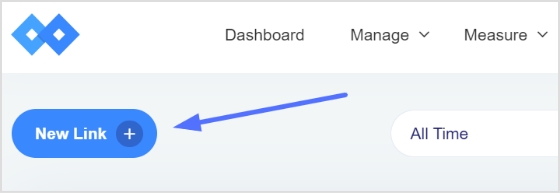
Step 2: Click create new link in the Replug links section.
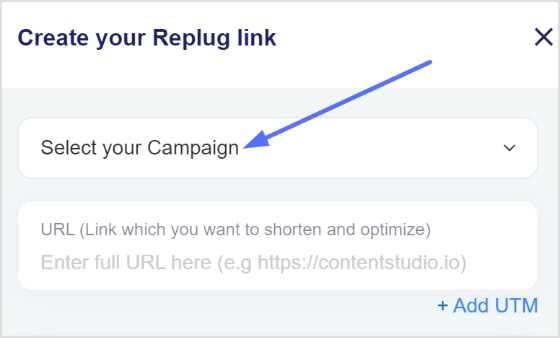
Step 3: To create a new link, you’ll need to select a campaign.
Note: Create a new campaign if you haven’t done so already.
Step 4: Enter the link to which you wish to add UTM parameters.
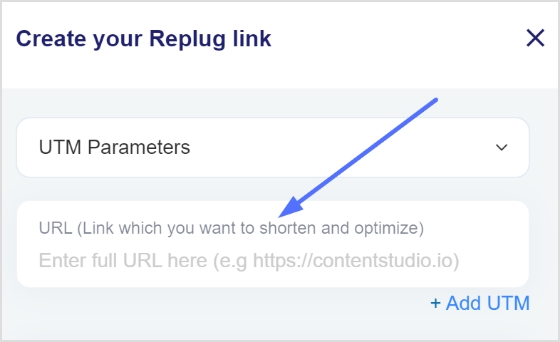
Step 5: Now click add UTM to add UTM parameters to your link.
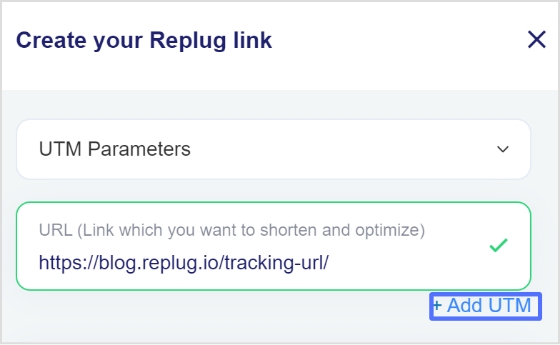
Step 6: Click select from the saved UTM parameter or create a new UTM preset.
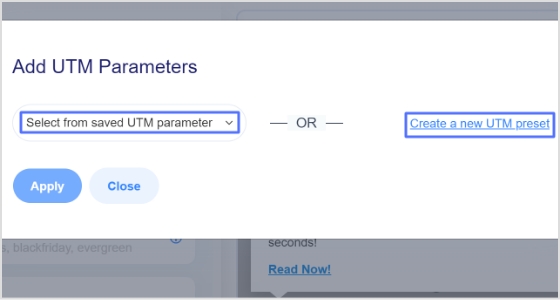
Step 7: Fill in the UTM parameters you want to track and click Apply.

Step 8: You will see UTM parameters at the end of your link; check them and click save.
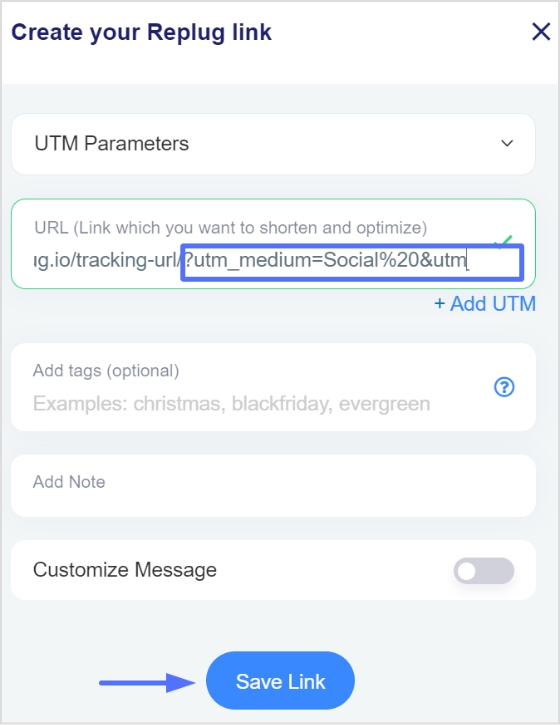
Step 9: Your link will automatically shorten. Edit your link, copy it, and share it directly on given platforms or download your link as a QR code.
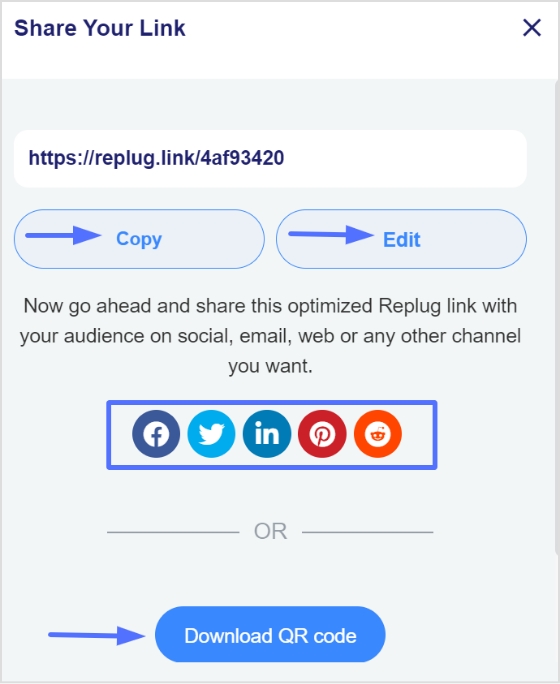
Your link with UTM parameters is ready to share and track engagements and clicks.
FAQs
How do I add custom UTM parameters for google analytics in the campaign UTM builder?
To add custom UTM parameters using the Google Analytics campaign URL builder, you can follow these steps:
- Go to the Google Analytics campaign URL builder page: https://ga-dev-tools.web.app/ga4/campaign-url-builder/
- Enter the URL of the page you want to link to in the “Website URL” field.
- In the “Campaign Source” field, enter the traffic source (e.g., Google, Facebook). This will be used to populate the utm_source parameter.
- In the “Campaign Medium” field, enter the medium of the traffic (e.g. CPC, banner). This will be used to populate the utm_medium parameter.
- In the “Campaign Name” field, enter a name for the campaign (e.g. summer_sale). This will be used to populate the utm_campaign parameter.
- Click the “Generate URL” button to generate the campaign URL with the UTM parameters included.
You can then use this URL in your marketing campaigns, and the traffic from these campaigns will be tracked in Google Analytics using the UTM parameters you specified.
Can you add a UTM code to a QR code?
Yes, it is possible to add a UTM code to a QR code. A UTM code is a set of parameters that can be added to a URL to track the source, medium, and other marketing campaign details. By adding a UTM code to a QR code, you can track the effectiveness of your marketing campaigns and understand how visitors are interacting with your website through the QR code.
To add a UTM code to a QR code, you will need to create a URL with the UTM parameters included and then generate a QR code using that URL. There are several online QR code generators that allow you to create a QR code by entering a URL, such as QR Code Monkey or QR Code Generator.


