Changing your Facebook URL can be a great way to make your profile more memorable and easier to find. It can also add a personal touch to your profile and make it easier for people to find you if they are searching for you on search engines.
Additionally, it can help to prevent confusion if you have multiple accounts with similar usernames. Finally, it can also help to ensure that your profile remains secure since anyone with your username can access it.
Here’s how to change your Facebook URL on mobile and desktop using a Facebook URL shortener.
How to change Facebook URL on your mobile?
You can easily change your Facebook URL through the Facebook Messenger app on your phone.
Follow these steps:
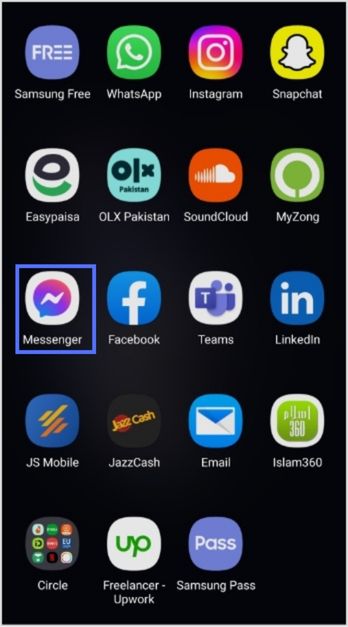
Step no 01: Open the Facebook messenger app from your phone.
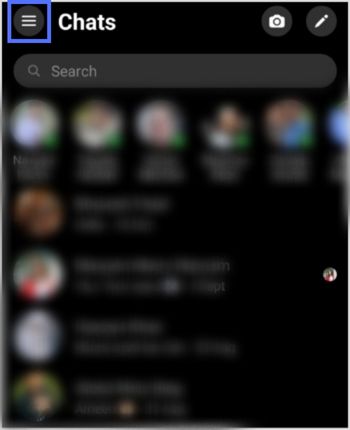
Step no 02: Tap on the three-lined menu icon in the top left corner.
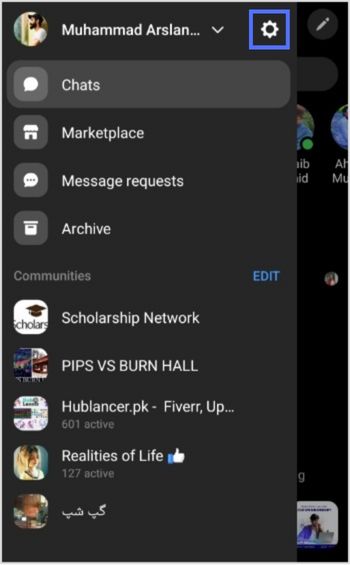
Step no 03: Now tap on the setting icon near the top right corner.
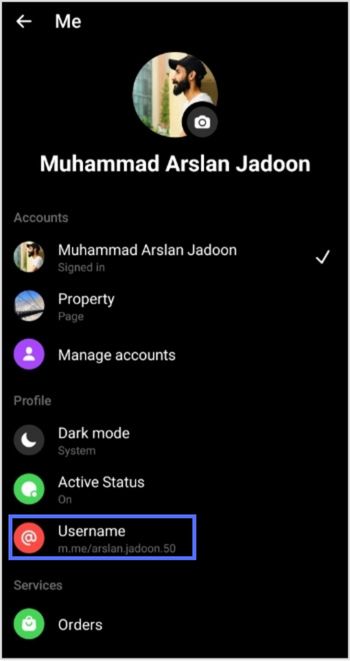
Step no 04: Look for the “Username” section and tap on it.
Step no 05: Now tap the “Edit Username” section.
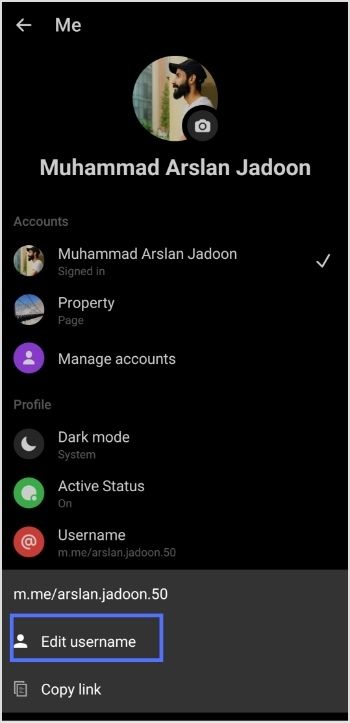
Step no 06: Type your new user name.
Note: Only available usernames can be selected. Try typing an alternate user name if your intended one is not available.

Step no 07: Tap save, and you’ll have your new user name, which will also be your new URL.

That’s it! Your Facebook URL has been successfully updated.
Increase your CTR with a Branded Link Now!
Related topic: How to unlink Facebook and Instagram?
How to change Facebook URL on your desktop?
You can change your Facebook URL from your computer by following these steps:
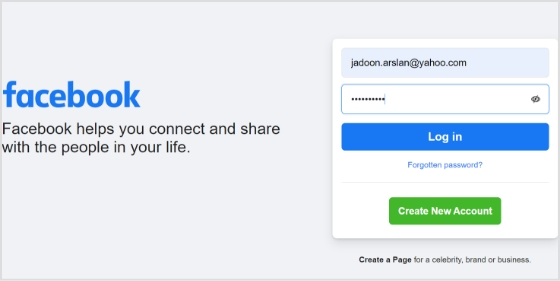
Step no 01: Log in to Facebook from your desktop.’
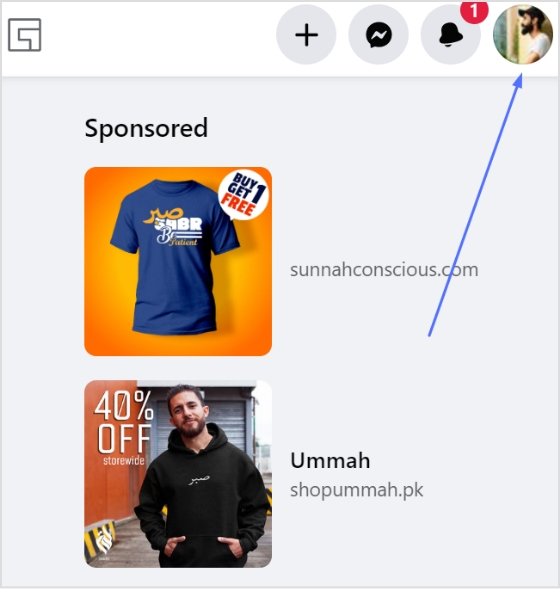
Step no 02: Click the profile icon at the top right corner.
Step no 03: Click setting & privacy from the drop-down menu.
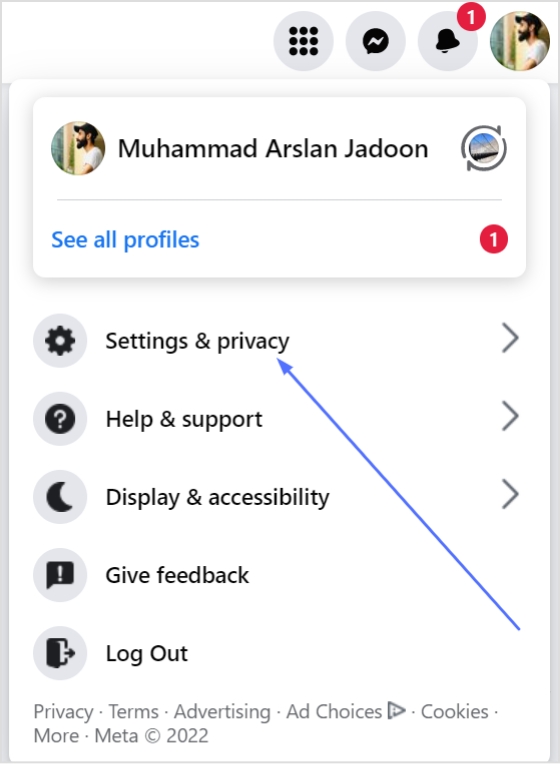
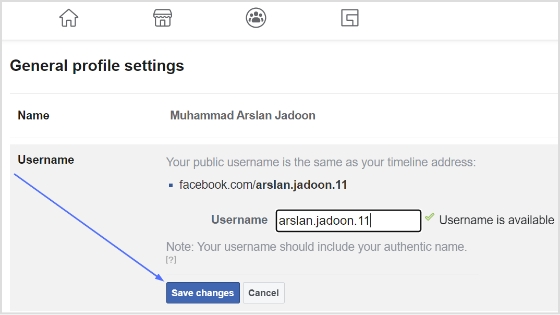
Step no 04: Now click settings, which will take you to the general profile setting page.
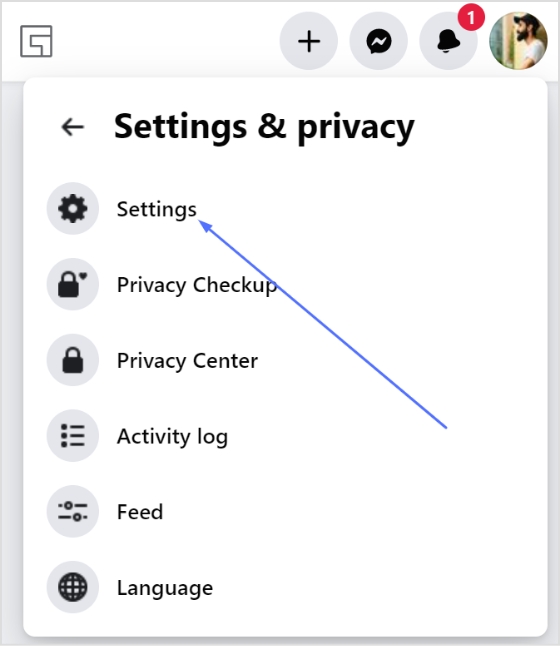
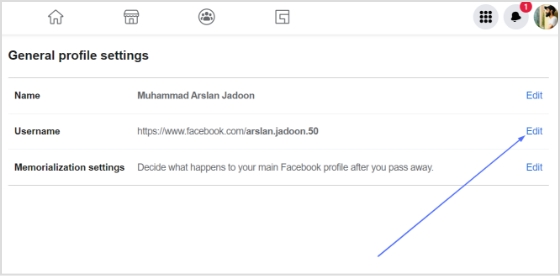
Step no 05: Click on Edit in the user name field.
Step no 06: Type your new user name, which will also be your new URL.
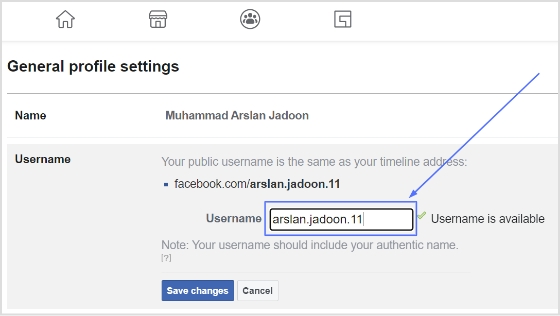
Note: You must check whether your chosen user name is available while typing. Try typing another option if your desired user name is not available.
Step no 07: Click the save changes button, and you’ll have your new URL.
Related Topic: A Complete Guide to Using the Facebook Pixel
Using Replug to change Facebook URLs
Replug makes it easy to shorten and customize your Facebook page URL while providing powerful features like link tracking and performance analytics.
With Replug, you can also apply custom branding to your links, offering a personalized touch that helps reinforce your brand identity. Here’s how to use Replug to update your Facebook page URL:
Step no 01: Log in to your existing Replug account. If you don’t have an account yet, create one—it’s quick and easy!
Step no 02: On the homepage, locate the “Quickly shorten your link” bar. Paste your Facebook URL into the field provided.
Step no 03: Click the edit button at the end of the URL bar. Enter the desired URL slug to personalize the link.
Step no 04: Click the “Save Shortened Link” button at the bottom. Once saved, your new, customized Facebook URL is ready to be shared with your audience!
By following these simple steps, you can enhance your Facebook page’s visibility and track how it performs using Replug’s robust tools.
FAQs on Facebook URLs
Why can’t I change my Facebook URL after following all the steps?
It may be because you have already changed your Facebook URL. Facebook only allows you to change your URL once, so if you changed it before, you would not be able to change it again.
What is a Facebook URL?
A Facebook URL is the unique web address used to access a specific Facebook profile, page, or post. It usually starts with www.facebook.com/ followed by the username, page name, or post ID.
How do I share my Facebook page URL?
Go to your Facebook page, copy the URL from the browser’s address bar, and share it directly on social media, in messages, or through email.
Why is my Facebook URL not working?
Your Facebook URL might not work if:
- The page or profile is deleted or deactivated.
- The username or page name has been changed.
- There’s a typo in the URL.
Trending Topics:
Why Your Business Needs a Custom URL Shortener?
Instagram URL Shortener Tools To Elevate Your Marketing
Using Vanity URLs for Social Brand Awareness
Amazon Link Shortener: 10 Reasons For Amazon Sellers To Try


